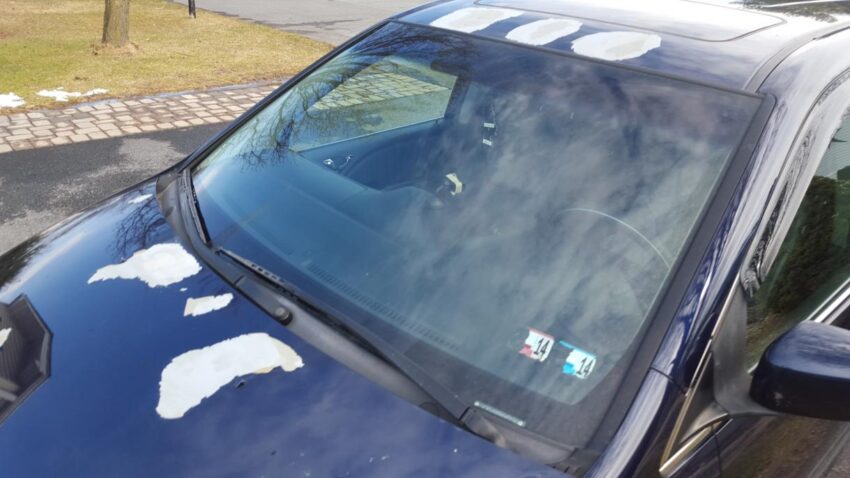
Is the paint on your car starting to peel? Don’t worry. You’re not alone. Peeling paint is a common issue faced by many car owners. It affects the appearance of your vehicle and can lead to further damage if left unattended. In this article, we’ll guide you on how to fix peeling paint on your car, helping you restore its aesthetic appeal and protect it from potential harm.
Your car’s paint is a protective layer, shielding it from the elements and enhancing its visual appeal. However, various factors can cause the paint to peel, including environmental conditions, poor paint jobs, and the natural wear and tear that comes with time. To fix this issue, it’s essential to understand the causes and address them effectively.
Understanding the Causes of Peeling Paint on a Car
Environmental Factors
Exposure to harsh environmental conditions such as constant sunlight, extreme temperatures, acid rain, salt, and pollutants can gradually degrade paint’s integrity, leading to peeling and chipping. These factors can have a detrimental effect on various surfaces, including fender flares. In addition to causing paint damage, prolonged exposure to these conditions can also contribute to the development of rust on fender flares and other metal components. It is important to know do fender flares cause rust and to maintain fender flares properly to minimize the risk of rust formation and preserve their appearance and functionality.
Poor Paint Job
If your car has undergone a subpar paint job, it’s likely to experience paint peeling sooner rather than later. Improper surface preparation, inadequate primer application, or low-quality paint products can all contribute to this problem.
Age and Wear
As your car ages, its paint naturally starts to wear off. Continuous exposure to road debris, scratches, and small dings can gradually weaken the paint’s bond with the surface, leading to peeling and flaking.
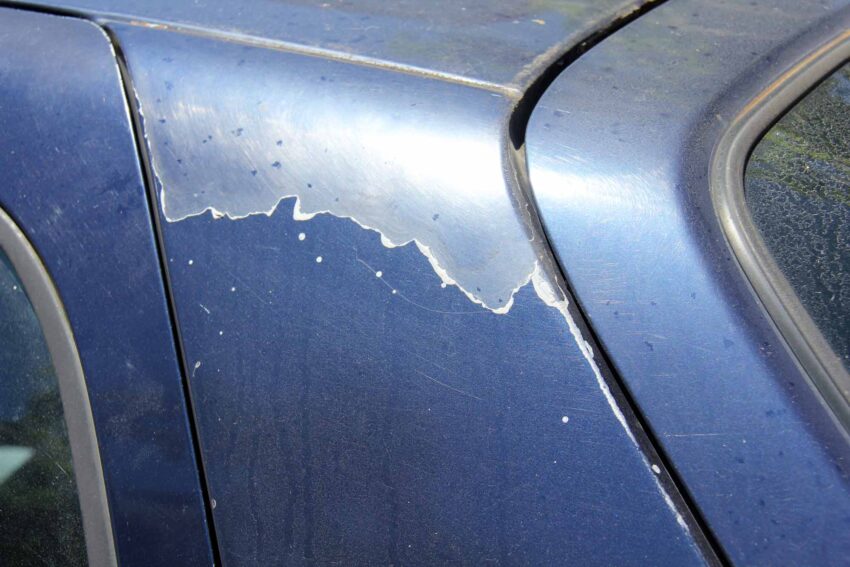
Assessing the Extent of the Damage
Before you begin the repair process, it’s crucial to assess the extent of the damage. This step will help you determine the necessary repairs and ensure you’re adequately prepared.
Inspecting the Peeling Area
Carefully examine the peeling area to determine its size and location. Is the peeling limited to a small section, or does it extend to multiple panels? Understanding the scope of the damage will guide you in choosing the appropriate repair method.
Identifying Additional Problem Areas
While inspecting the peeling paint, watch for other problem areas. Look for signs of rust, corrosion, or underlying damage requiring additional attention. It’s essential to address these issues to prevent further paint damage in the future.
Preparing the Surface for Repainting
You must prepare the surface properly before you can repaint your car. This involves cleaning the exterior, removing loose paint and rust, and smoothing the surface for optimal paint adhesion.
Cleaning the Car’s Exterior
Start by washing your car thoroughly to remove dirt, grime, and other contaminants that may hinder the paint’s adhesion. Use a mild car detergent, a soft sponge or microfiber cloth, and plenty of water for a thorough cleaning.
Removing Loose Paint and Rust
Next, use a scraper or a wire brush to remove loose or peeling paint. Be careful not to damage the underlying metal or plastic surface. If you encounter rust, use sandpaper or a rust remover to eliminate it before proceeding.
Sanding and Smoothing the Surface
To create a smooth and even surface for repainting, sand the affected area using fine-grit sandpaper. This step helps remove any remaining paint flakes, smooth out rough edges, and promote better adhesion between the new paint and the surface.
Choosing the Right Paint and Supplies
Selecting the right paint type and gathering the necessary tools and materials are crucial for a successful repair.
Selecting the Correct Paint Type
When choosing paint, ensure it matches your car’s original color and finish. Acrylic or enamel paints are commonly used for touch-ups. Consult your car’s manufacturer or a professional paint supplier to find your vehicle’s most suitable paint product.
Gathering the Necessary Tools and Materials
To complete the paint repair, you’ll need various tools and materials, including paintbrushes, masking tape, a paint sprayer (if applicable), primer, paint, a clear coat, sandpaper, and a clean cloth. Ensure you have everything at hand before starting the painting process.
Applying Primer and Paint
Once the surface is prepared and the materials are ready, it’s time to apply the primer and paint to restore your car’s appearance.
Priming the Surface
Apply a thin and even layer of automotive primer to the prepared surface. Primers enhance paint adhesion and provide a smooth foundation for the topcoat. Follow the manufacturer’s instructions for drying time and sanding, if necessary.
Applying Multiple Coats of Paint
Applying multiple thin coats of paint to the primed surface using a paintbrush or paint sprayer. Allow each coat to dry fully before applying the next one. Applying thin layers ensures a more even and professional-looking finish.
Ensuring Proper Drying Time
After applying the final coat of paint, allow it to dry completely. The drying time may vary depending on the paint type and environmental conditions. Be patient and ensure adequate drying to avoid smudges or imperfections.
Blending the New Paint with the Surrounding Area
To achieve a seamless finish, blending the new paint with the surrounding area is important, minimizing any noticeable transitions.
Feathering Technique
Using fine-grit sandpaper or a blending pad, gently feather the edges of the new paint to create a smooth transition between the repaired area and the existing paint. This technique helps blend the colors and avoids stark contrasts.
Buffing and Polishing the Surface
To further enhance the appearance of the repaired area, consider buffing and polishing the surface. Use a quality automotive polish and a soft cloth to bring out the shine and ensure a uniform finish.
Protecting and Maintaining the Repainted Area
Once the paint repair is complete, protecting the repainted area and maintaining its longevity is important.
Applying Clear Coat for Protection
Apply a clear coat over the newly painted area to protect it from UV rays, scratches, and other environmental factors. Clear coats provide an additional layer of durability and enhance the paint’s gloss and longevity.
Regular Washing and Waxing
Establish a regular washing and waxing routine to maintain the appearance of your car’s paint. Wash your car using a mild detergent, soft sponge, or microfiber cloth. Apply quality car wax to protect the paint and provide a glossy finish.
Professional Help vs. DIY
Deciding between seeking professional assistance or opting for a DIY approach depends on various factors.
When to Seek Professional Assistance
If the peeling paint covers a large area or you lack the necessary tools, skills, or confidence to perform the repairs yourself, it’s best to consult a professional auto body shop. They have the expertise and equipment to handle extensive paint repairs and ensure flawless results.
Benefits of DIY Repairs
Performing the paint repairs can save you money and provide a sense of accomplishment. It’s a viable option for minor peeling issues or touch-ups. DIY repairs also allow you to address the problem promptly without scheduling appointments or waiting for professional services.
Conclusion
Peeling paint on your car can be frustrating, but with the right knowledge and techniques, you can fix it effectively. By understanding the causes of peeling paint, properly preparing the surface, choosing the right paint and supplies, and following the step-by-step repair process, you can restore your car’s appearance and protect it from further damage. Whether you decide to tackle the repairs yourself or seek professional assistance, addressing peeling paint promptly will ensure your car continues to look its best.
You may like to read Does Louis Vuitton Clean Bags for Free?